DST
By adding a time zone in the DST menu, you can apply it to the site and devices in countries that observe seasonal daylight saving time (DST).
In the DST menu, you can save time zones and schedules, and on the Edit Device panel that can be loaded in the Registered Devices, menu you can apply DST for each device.
This article summarizes 1) how to add DST schedules in Portal, and 2) how to apply the DST feature to devices.
How to add DST
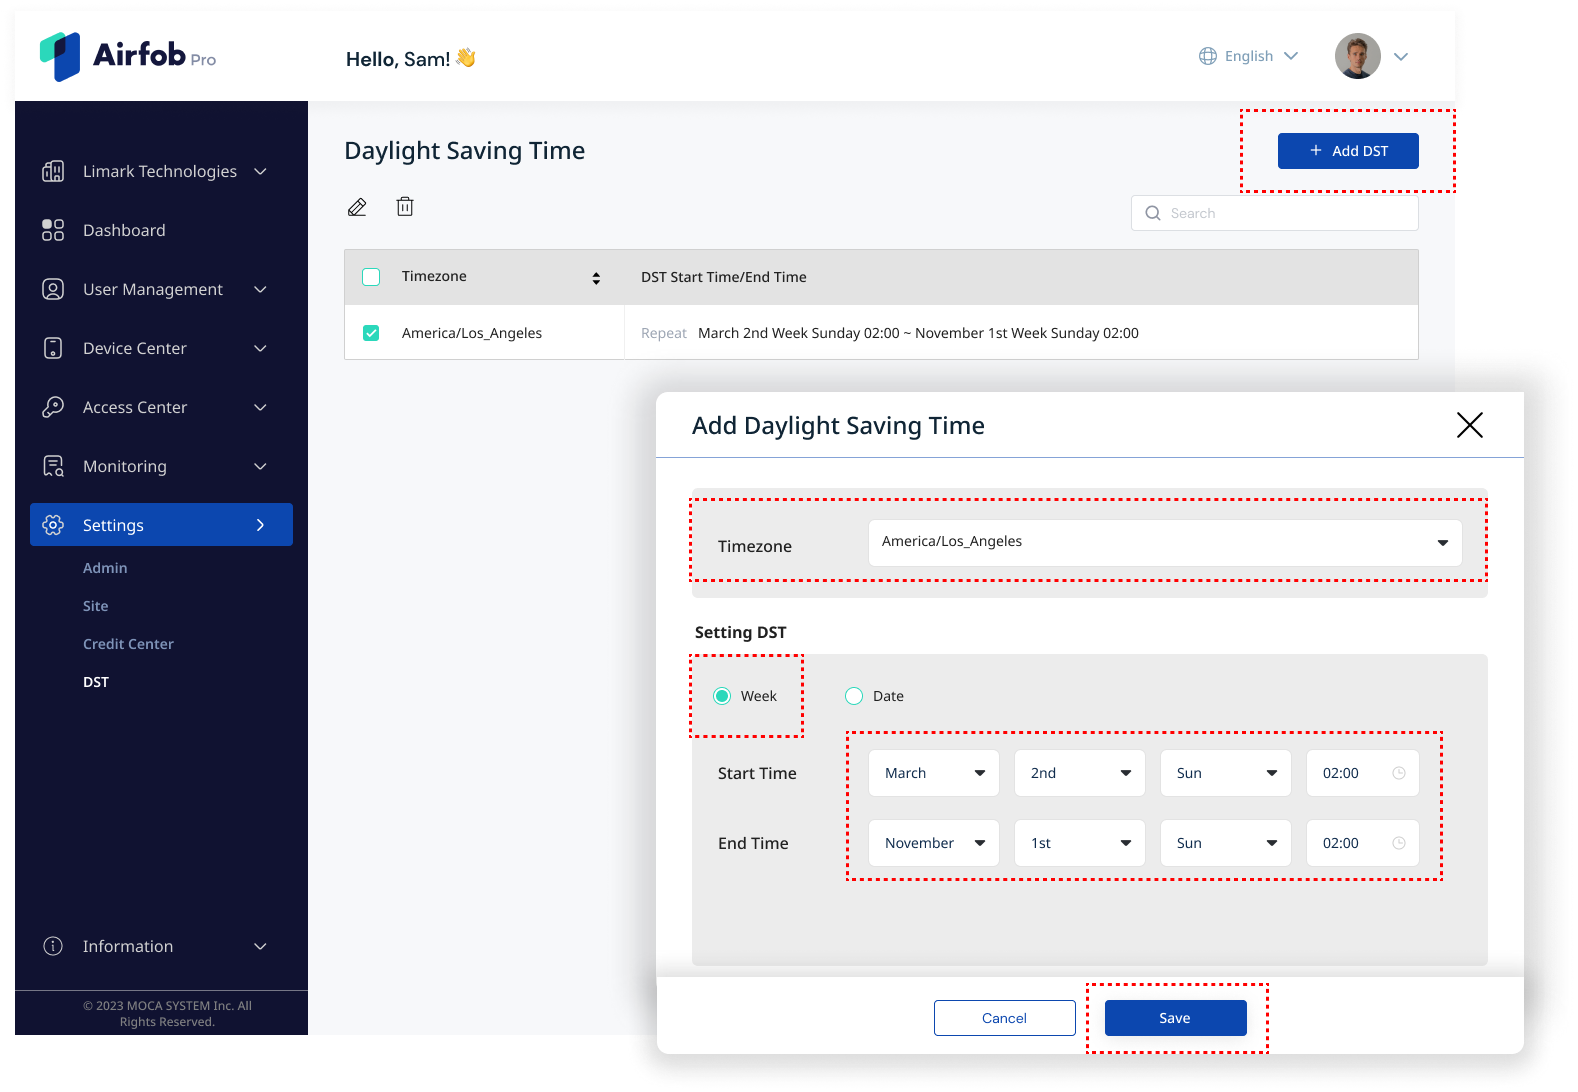
In the Airfob Pro portal, when you enter the Settings > DST menu, you will find a + Add DST button on the top right corner of the screen, click the button to add a new DST schedule. After you added the DST, you will need to enable the feature for the devices that should be used to DST, and if enabled, they will automatically change time zones according to the schedule.
Ex, DST in LA starts on the second Sunday in March and ends on the first Sunday in November each year.1) Open the DST menu under Setting category, and click the + Add DST button.2) Under Time zone, select America/Los_Angeles.3) Under DST settings, check Week.4) For Start time, enter the start time of 02:00 on the second Sunday of March.5) For End time, enter 02:00 on the first Sunday in November.6) Click the Save button to create the DST schedule.


After creating a DST, you must enable the DST feature on the device information.
Apply the DST feature to devices
You must change the device settings individually on devices that need DST to be applied. If you don't enable DST in Edit device information, it won't be applied.
1) Move to the Registered Device menu under Device management category.2) In the list of devices, click the area of the device you want to apply DST feature.3) On the Edit Device panel, switch the gray toggle next to the Use DST into green color.4) After the toggle turned to the green, clock the save button to finish it.
Related Articles
Preparing your site for Daylight Saving Time (Details)
Preparing Your Airfob Space Site for the End of Daylight Saving Time As we approach the end of Daylight Saving Time (Summer Time) in regions like Europe, the UK, the United States, and Australia, it’s essential to ensure your Airfob Space site is ...Site
Administrators with master permissions on a site can modify a variety of settings related to security and usability. The site menu can only be viewed by Master or Admin level of administrator account, and only master accounts can modify all of the ...Registered Devices (How to registering devices)
All Airfob devices (mobile card readers) installed in the space and registered to the site are displayed in the Registered Devices menu. From the Registered devices menu, you can remotely manage related to the devices, such as checking the network ...